This blog post may contain affiliate links at no additional cost to you, however I may earn a small commission if you choose to purchase. I only recommend products I would use myself!
Today I get to formally introduce you to the Prairie Rose Quilt!
You can find the PDF pattern here and the paper pattern here!
Prairie Rose is a vintage-inspired/retro star/flower block-based pattern. It’s my modern take on a more traditional style!
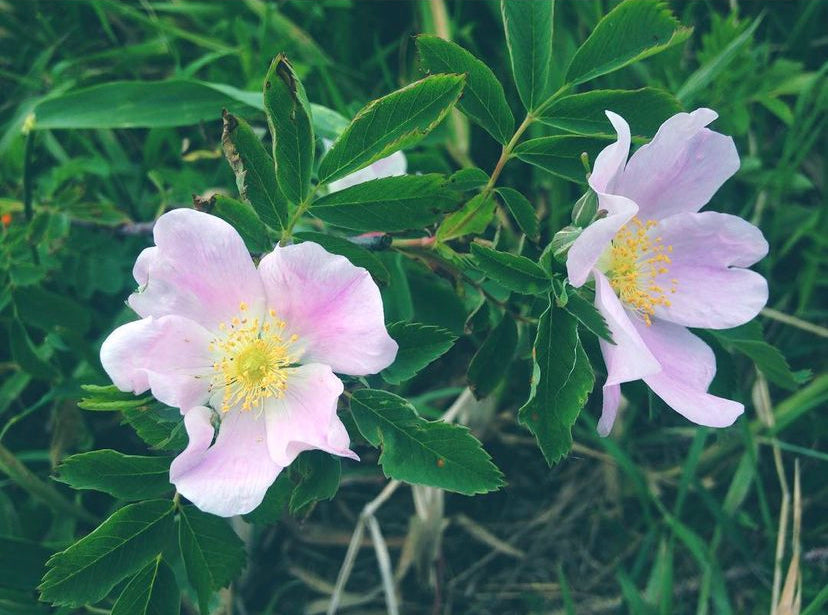
I live in the Manitoban prairies and I’ve always been inspired by all of the prairie wildflowers with bent petals from the wind or little nibbles from caterpillars and other critters. Imperfect beauty! Wildflowers have always been my favourite type of flower because of their imperfection and resiliency to grow just about anywhere!
I have also always had warm and fuzzy feelings from the sentimental flower pattern that seemed to be on EVERY grandma's china growing up. Do you know which one I mean!? Prairie Rose is definitely a nod to that type of floral design!
Throughout my whole life, I've never lived near any of my extended family. However, my husband's grandparents have taken me in as one of their own and I absolutely adore them. They live in a region in Manitoba that used to be called “Prairie Rose” many years ago.
I wish I had more pictures of me with Chris's grandparents. Chris's grandma always manages to duck out of every picture - maybe yours is similar! However, this is me on their amazing property in front of the old family farmhouse with a Pine Falls Quilt that I made for my husband's aunt!
I love to name my patterns after towns or places in Manitoba. So, the name Prairie Rose was only fitting!
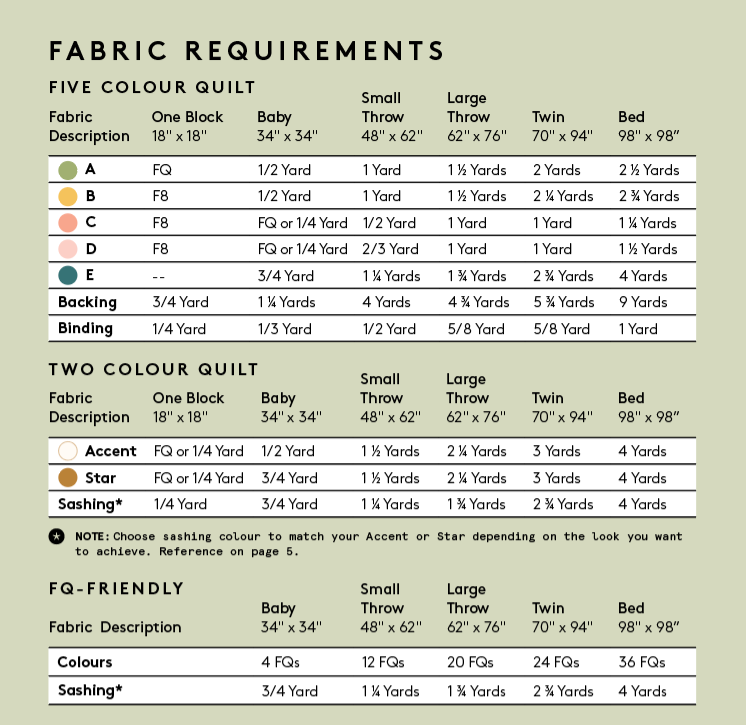
I decided that I wanted to include ALL of the options for this pattern! There’s something for everyone including a two-colour quilt, five-colour quilt and even a FQ-friendly one!
Here are the fabric requirements:
Prairie Rose is ideal for confident beginners! In this pattern you will create Flying Geese, Strip Piecing and Square in a Square blocks. Easy-to-follow instructions are included for SIX different sizes:
- One Block/Pillow - 18" x 18"
- Baby - 34" x 34"
- Small Throw - 48" x 62"
- Large Throw - 62" x 76"
- Twin - 70" x 94"
- Bed - 98" x 98"
This pattern utilizes a 12" block design, which is one of the reasons why it’s so beginner-friendly! My other block-based patterns include:
Prairie Rose Cover Quilt
I made the cover quilt in the small throw size and used the five-colour option.
I really wanted to use more vintage-leaning colours and I was inspired by my parents' wedding photos. The bridesmaids all wore gorgeous 70s floral dresses and I knew I needed to incorporate those colours into the quilt!
I also wanted to ensure there was an organic feel to the colours I chose, which is why I pulled colour inspiration from prairie roses themselves.
Prairie roses are typically pink on the outside with yellow on the inside. I've always been partial to yellow flowers versus pink, so I decided to reverse the colours! (Also, take a peek at the flowers on my parents wedding cake!)
The lighter green background represents leaves and the deep green is for grassy fields where wildflowers grow.
I used Kona cotton in the following colours:
I've had this yellow gingham in my stash for quite a while, and I immediately knew it had to go on the back because it screamed “prairie picnic” to me! It’s called “Grellow” from Elizabeth Hartman’s Kitchen Window Wovens. I used Spruce as the binding to seamlessly blend with the borders - I really wanted the quilt design to speak for itself!
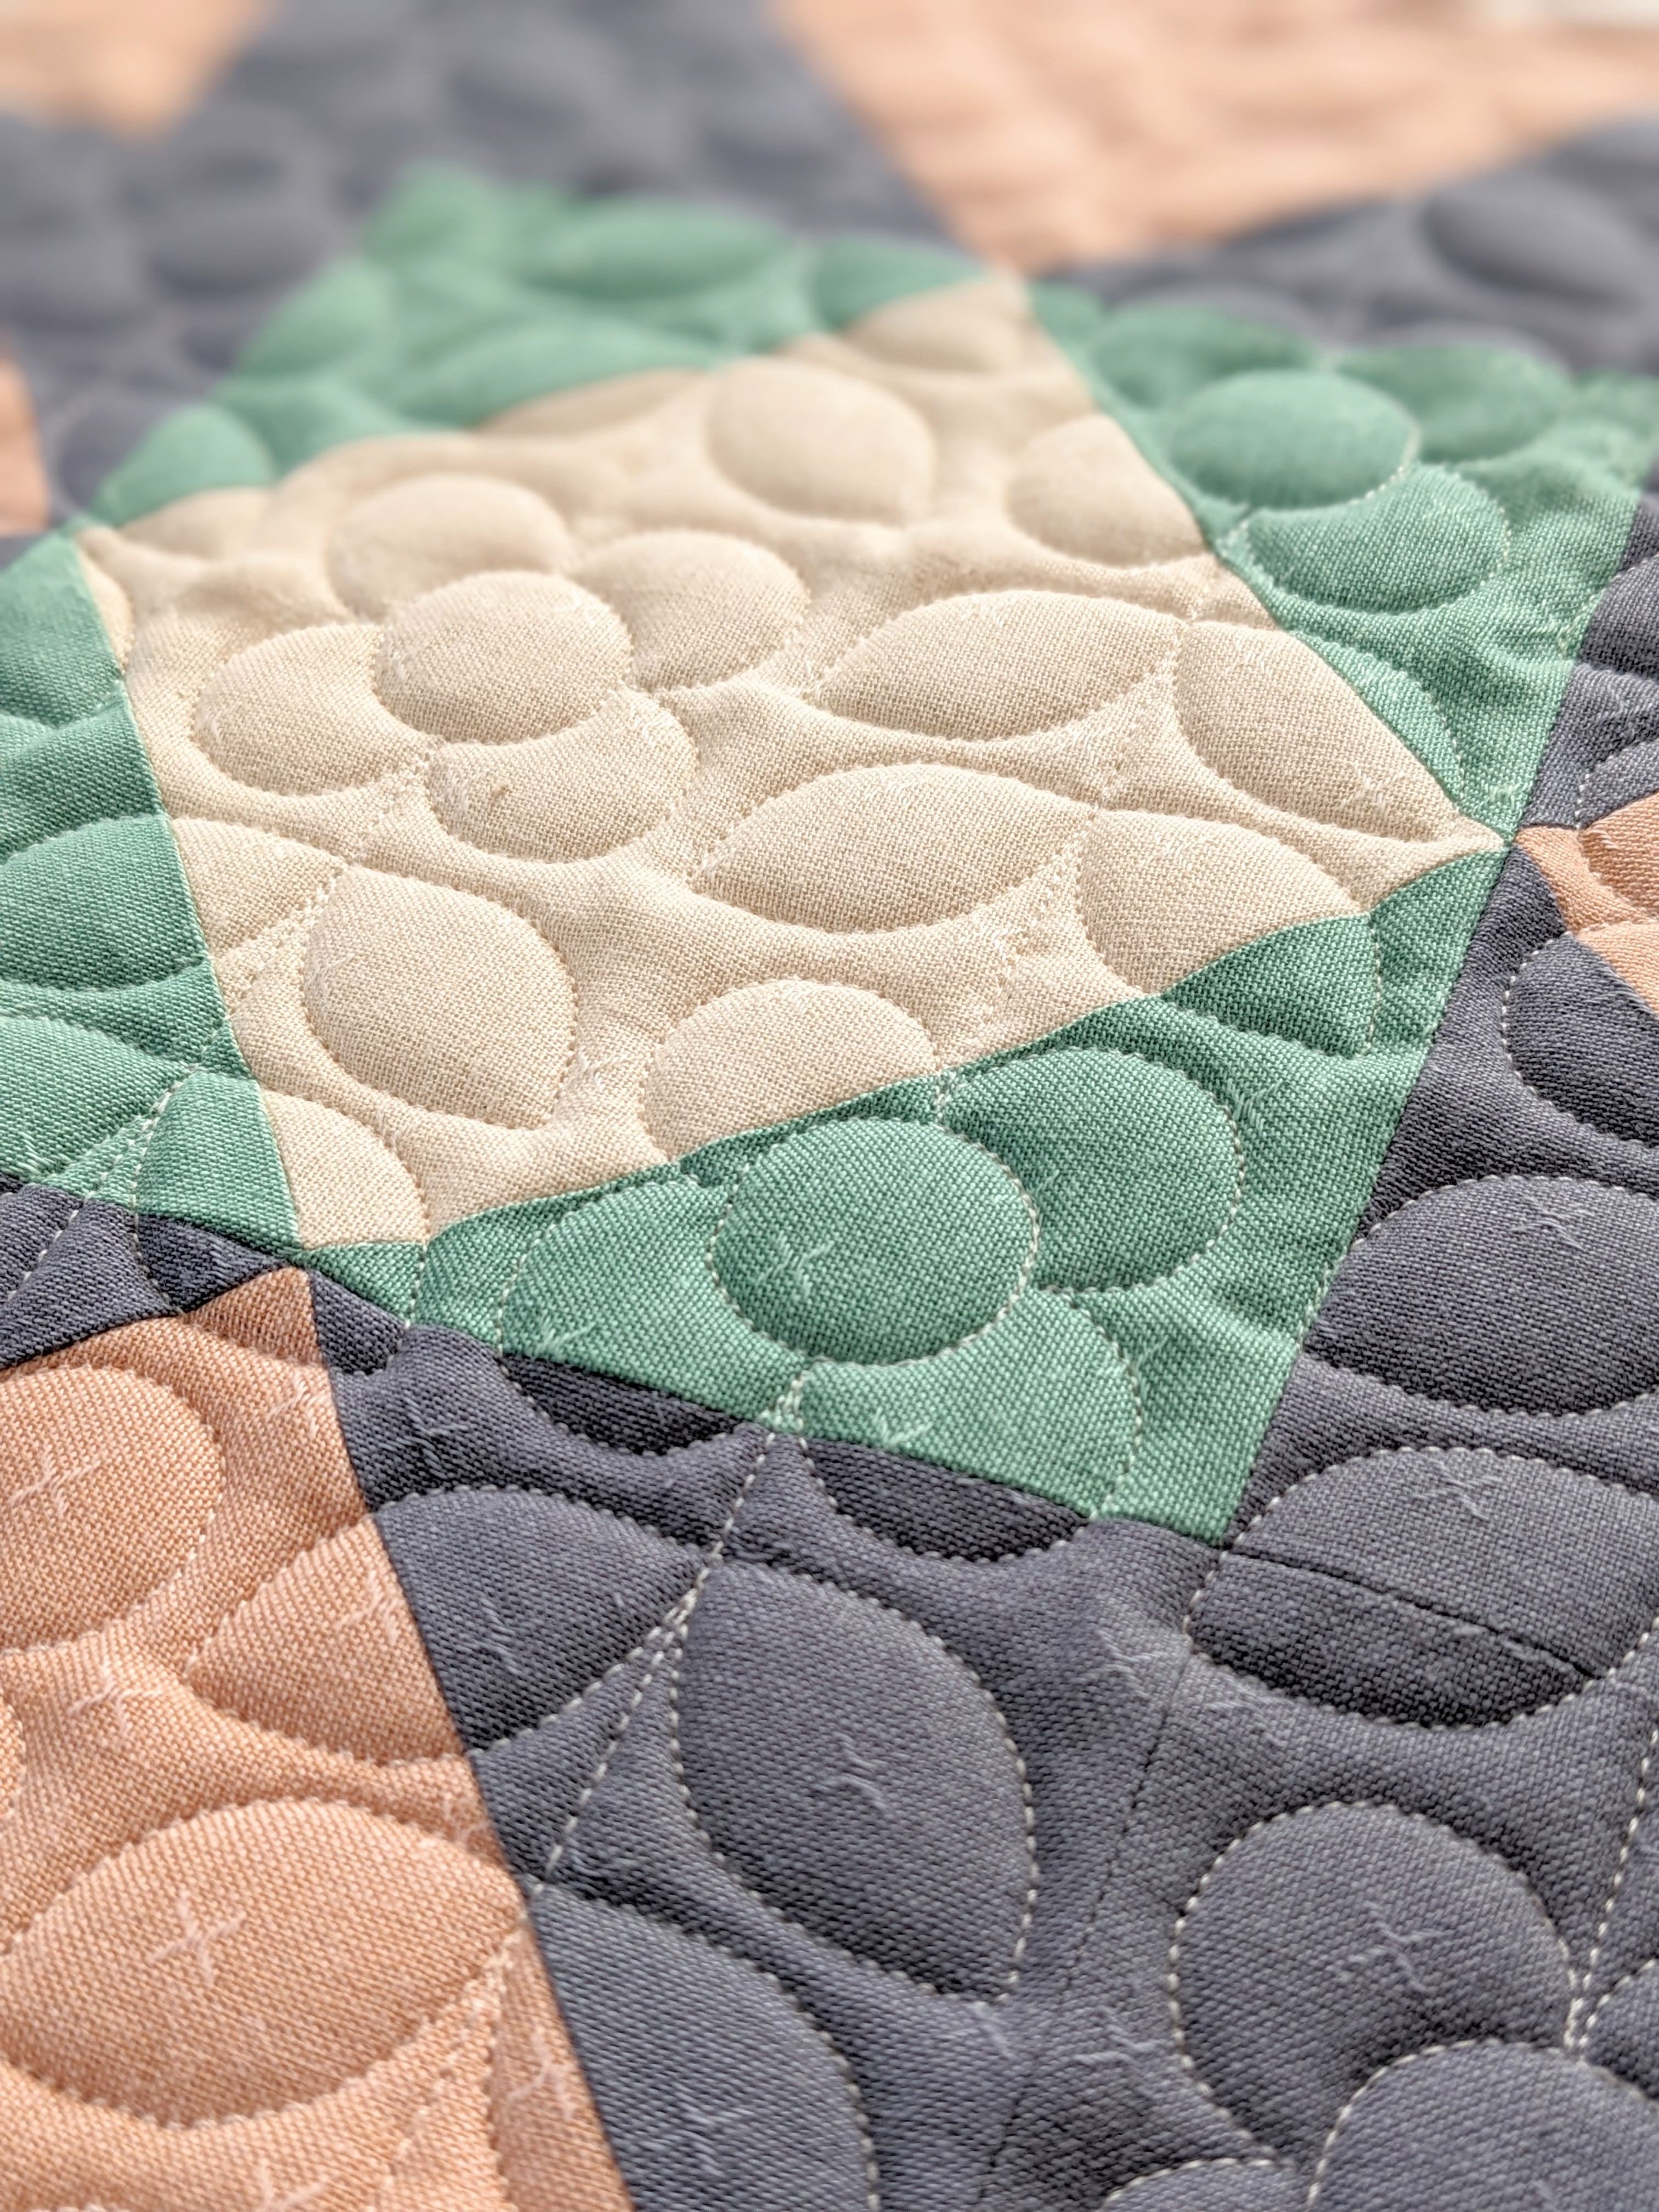
For the machine quilting, I did an “S” shape using ¾” spacing. I wanted it to feel soft and organic, like wind blowing through a field of wildflowers.
Just as I did with my recent spring version of Paint Lake, I used a Hera marker (Canadians, click here) and free-handed starting from one corner, arching to the centre, then arching to the other corner. I quilted the very first line directly on the marked line. Then I moved the needle position as far over to one side as I could and used the edge of my presser foot as a guide following the previous line.
I really didn’t stress about it being absolutely perfect - because, in nature, nothing is perfect! This technique also eliminates the stress of creating perfect vertical or horizontal straight-line quilting, while still looking somewhat linear!
I intentionally used a softer coloured thread. I felt like white was too stark, but still wanted it to look and feel "almost white". So, I used 50wt Aurifil Thread in Light Sand 2000 (Canadians, click here).
FQ Version
I know that making a fat quarter-friendly pattern and quilt is a very normal thing for a lot of quilters…but it’s not for me! I’ve always had a fear that somehow I would mix/match all the wrong colours and fabrics together or that it would feel off-balance in some way (read: UGLY).
Making this quilt felt like a big step outside my comfort zone. But let me say…I am SO HAPPY I did it! Isn’t that often the case after we try something hard?!
I used the new Sprout Wovens from Fableism and they are absolutely dreamy!
After cutting all the fabric, I sorted it by colour into 20 blocks. At first, the idea of mixing and matching the colours into blocks felt paralyzing, but once I got into the groove, it started to be really fun!
Once again, I wanted a more vintage and organic feel to the fabrics. These Sprout Wovens felt just right because the colours are muted and earthy in the most beautiful way - kind of like they’ve already been washed and well-loved! Yet the quality of the fabric is second to none, so it still gives a high-quality look!
It’s also a newer fabric line, which is always exciting for me! Andrea Patton, who is the Founder of Cottoneer Fabrics in California and the owner of Fableism Supply Co, was actually the very first shop to collaborate with me over four years ago when I released the Spruce Woods Quilt pattern! She made a bundle in her shop that matched the cover quilt and we partnered for a giveaway.
So when I saw that she was releasing the Sprout Wovens line, I immediately placed an order for the whole collection!
For the main parts of the blocks, I used:
- Chamomile
- Pink Sand
- Sun Glow
- Cider
- Autumnal
- Black Cherry
- Marsala
- Wild Rose
- Peachy
- Mallard
- Pineneedle
- Malachite
- Cenote
- Arctic
- Storm
- Ocean
- Midnight
- Stellar
- Porcelain
- Mountain Ridge
I decided I wanted the centre of the blocks to all have a cohesive look, so I used Oat and Almond Sprout Wovens and then Kona Cotton in Natural for the sashing. I chose Moonglow in Natural from Ruby Star Society for the backing and Robert Kaufman’s Crawford Stripes in Forest for the binding.
Photo by Shelly from Ma Tante Quilting
I sent this quilt to the ever-talented Shelly of Ma Tante Quilting! We decided on a flower pantograph called “Posy Patch”. I loved that the quilting came out small and dense, creating the perfect amount of texture and puff! We can also thank the wool batting for that!
Photo by Shelly from Ma Tante Quilting
Photo by Shelly from Ma Tante Quilting
Photo by Shelly from Ma Tante Quilting
Two-Colour Version
Next up, I made this two-colour version in the baby size. Well, technically I made TWO of the two-colour version! Because why not?!
Instead of making two different quilts, I quilted the two quilt tops together! To me, this felt like the perfect way to show you how just switching one colour creates two totally different looks. I like being efficient that way!
You might know that I have a tendency to lean towards making two-colour quilts using Kona Black and Natural. But once again, I decided to branch out! I used Kona Natural and Caramel instead for a sweeter feel. It reminds me of snow and wheat, creating a soft and organic look.
I used the same fabric for the stars on both sides, as well as the same fabric for the accent colour. All I did was change the sashing colour, which shows an “inverted” look. Pretty cool!
Normally, when I baste a quilt, I make sure the backing fabric is slightly larger than the batting and quilt top. Because I was quilting two quilt tops together, the front and the back were going to be the same size. When machine quilting, you want to have your batting slightly larger than the quilt top, in case you have any shifting or movement.
So, I needed to get creative!
The baby size quilt top finishes at 34” x 34”. I decided to make the borders on one quilt top an inch wider on all sides than instructed in the pattern, making it finish at 36” x 36”. This became my “quilt back”. I then cut the batting so it measured 35” x 35”. This ensured that when I layered the back, batting and top, everything was perfectly stacked and easy to quilt! When I completed the quilting, I was able to trim off the excess fabric.
I made sure to take some extra time to do my best at lining up the blocks and sashing on the front and back of the quilt. I even went so far as to hold the three layers up in front of a window so it was backlit. This gave me a pretty good look at all the layers.
I opted for wavy machine quilting stitches for this one. Partly because it felt flow-y and natural, but also because it did a good job of hiding any inconsistencies with the front and back lining up!
For the Natural side (top thread), I used 50wt Aurifil Thread in Muslin to blend in with the sashing. For the Caramel side (bobbin thread), I used 50wt Aurifil Thread in Light Cinnamon (Canadians, click here).
For the binding, I used Robert Kaufman’s Crawford Stripes in Mustard.
Fabric Bundles
Prairie Rose fabric bundles are available in the shop right now for both the cover and two-colour versions!
Run don’t walk, because there is only a handful available of each bundle!
SALE!
To celebrate the Prairie Rose release, ALL PDF patterns, PAPER patterns, TBS DOWNLOADABLE PRINTS & STICKERS are 20% off!
Discount will be automatically applied at checkout. Sale runs now until June 25, 2022 at 11:59 CDT.
Tomorrow I’ll be sharing the Prairie Rose pattern tester quilts in another blog post along with bonus information about the actual humans behind the quilts!
And stay tuned for details on a couple of other versions I made. I just couldn’t help myself!
If you decide to make your own Prairie Rose Quilt, please make sure to use the hashtags #prairierosequilt and #blanketstatementpatterns. I’d love to see!
Have questions about this pattern or any other ones in the shop? Please reach out to hello@theblanketstatement.ca and we’ll help you out!


